
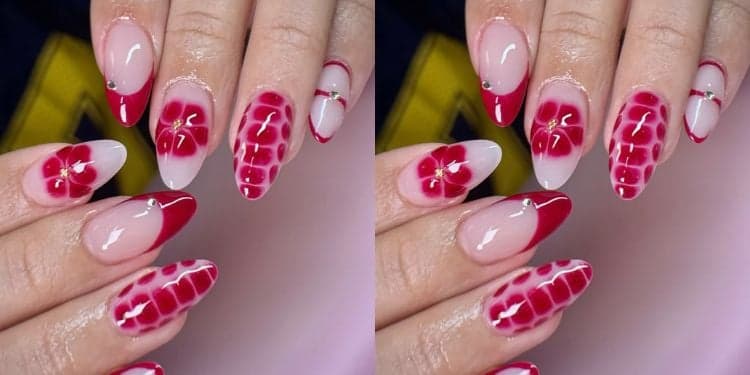
Blooming gel nail art is a popular nail style among nail enthusiasts because it creates soft, watercolor-like designs with minimal effort.
Unlike traditional nail art techniques requiring advanced brush skills, blooming gel allows colors to spread and blend naturally on the nail surface.
The trend has gained popularity among both professional nail technicians and DIY beauty lovers as it offers a salon-quality finish.
According to Miami-based celebrity nail artist John Avery, blooming gel simplifies the process of creating intricate designs.
“Blooming gel makes intricate nail art much more approachable. It creates beautiful, organic movement that feels artistic and elevated, while requiring less precision than hand painting every detail, and it’s great for beginners too,” John Avery notes.
How to Create Blooming Gel Nails at Home
Blooming gel is a clear specialty gel applied over a cured base color before decorative gel shades are added.
The unique formula causes colored gel polish to spread and diffuse across the surface while the blooming layer remains uncured, creating a soft watercolor effect.
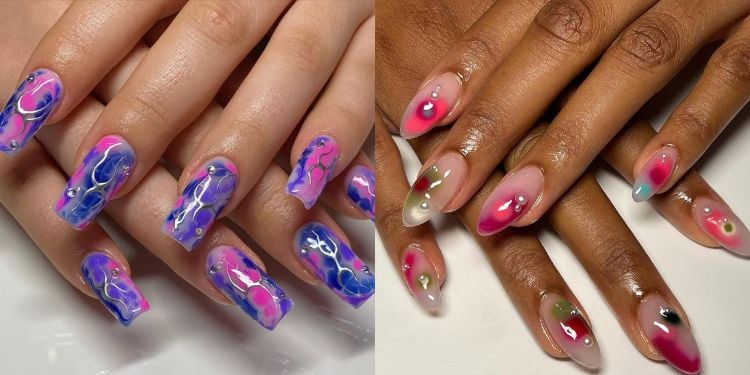
The technique works especially well for floral designs, marble effects, abstract artwork, tortoiseshell patterns, and diffused gradients.
Before the application process, gather basic manicure essentials, including a nail file, buffer, cuticle pusher, lint-free wipes, gel base coat, blooming gel, colored gel polishes, a top coat, and an LED or UV lamp.
Begin by preparing the nails. Push back cuticles, file and shape the nails, and gently buff away surface shine.
Clean the nail plate thoroughly using rubbing alcohol or a nail dehydrator.
Next, apply a thin layer of base coat and cure according to the manufacturer’s instructions, followed by one or two coats of a light base color such as milky white, nude, blush pink, or a pastel shade.
Once the base color is cured, apply a thin layer of blooming gel but do not cure it.
Using a brush or dotting tool, place small dots, lines, or strokes of colored gel onto the wet surface. Within seconds, the colors will begin spreading and blending naturally.
Allow the design to develop for approximately 10 to 30 seconds before curing the nail under an LED or UV lamp, then seal with a glossy top coat.
Best Colors for Watercolor Nail Art
Experts generally recommend sheer, jelly, syrup, or pastel gel polishes because they create a softer and more translucent finish than heavily pigmented formulas.
| Style/Effect | Recommended Colors |
| Soft Floral | Blush pink, lavender, peach, baby blue, milky white |
| Sunset Watercolor | Coral, rose pink, peach, lilac, pale yellow. |
| Botanical | Sage green, mint, olive, cream, soft brown |
| Ocean Inspired | Aqua, turquoise, sky blue, lavender, white |
| Romantic Marble | Nude, dusty rose, mauve, burgundy |
| Bright Abstract | Fuchsia, cobalt blue, lime, orange, violet |
| Elegant Neutral | Milky white, beige, taupe, champagne, caramel |
According to Nail experts, a beginner’s gel collection should have shades that can be mixed and matched across a wide range of designs.
A strong beginner palette includes a milky white or sheer nude base, blush pink, lavender, sky blue, peach or coral, and sage green.
For contrast and depth to nail art designs, the starter pack should include a darker accent shade such as plum, navy, or forest green.
Easy Designs for Beginners
One of the easiest blooming gel nail styles to master is the watercolor flower.
Using a nude or pale pink background, place dots of pink, purple, and white gel onto the blooming layer and finish with a darker center color.
As the shades spread, they create petals that resemble hand-painted flowers.
Watercolor marble is another beginner-friendly option that features thin, flowing lines of complementary colors drawn over the blooming gel and lightly manipulated with a detail brush to create realistic marble veins.
For a softer look, nail technicians advise beginners to start with an ombré bloom.
Applying dots of lavender and pink from the cuticle area toward the tip creates a diffused gradient as the colors merge, creating an ombré bloom style.
To achieve cleaner blooming gel nail designs, use thin layers of gel throughout the application process. In addition, it is also advisable to start with a small amount of color and build intensity gradually.
Beginners can create additional depth by combining one light, one medium, and one dark shade from the same color family to help produce smooth transitions while maintaining definition within the design.
Blooming Gel Nail Design Ideas
| Design | Color Combination |
| Pink Blossom | Milky nude base + blush pink + rose pink + white |
| Lavender Marble | Sheer white base + lilac + lavender + deep purple |
| Tropical Watercolor | Nude base + coral + turquoise + mint |
| Sunset Nails | Sheer peach base + coral + pink + pale yellow |
| Sage Botanical | Cream base + sage green + olive green + brown |
| Ocean Breeze | Milky white base + baby blue + aqua + navy |
Follow our WhatsApp Channel and X Account for real-time news updates.



Comments
No comments yet. Be the first to share your thoughts.